
You spent four months building your FTP. You bought a disc wheel. You shaved your legs, though you're still not entirely sure that helps aerodynamically. And then you show up to your race and ride 40km hunched over your bars like a man arguing with his stem, hip flexors screaming, position collapsing somewhere around the 25km mark, and your run splits looking like you got off the bike and immediately forgot how legs work.
Here's the uncomfortable truth: for most age-group triathletes, bike fit is the single biggest performance leak on the course. Not your FTP. Not your tires. Your position. A poorly fitted triathlete on a $6,000 Cervélo is getting beat by a well-fitted athlete on a $1,500 entry-level TT bike — and the difference often comes down to one number: hip angle.
This guide covers everything you need to know to stop leaking time on the bike and stop destroying your legs before the run even starts. We'll get specific — angles, measurements, protocols, and the checklist to bring to a professional fitting appointment. No fluff. Just the mechanics of going faster.
Why Most Triathlete Bike Fits Are Wrong
The road cycling world has a head start on bike fitting. Decades of professional racing have produced detailed protocols, certified fitters, and well-understood parameters. Triathlon borrowed most of it — and that's exactly the problem.
A road cycling fit optimises for maximum sustained power output. A triathlon bike fit optimises for something more complicated: maximum sustained power output over a distance that is followed immediately by a run. Those are not the same thing, and the difference matters enormously once you're over about 90 minutes on the bike.
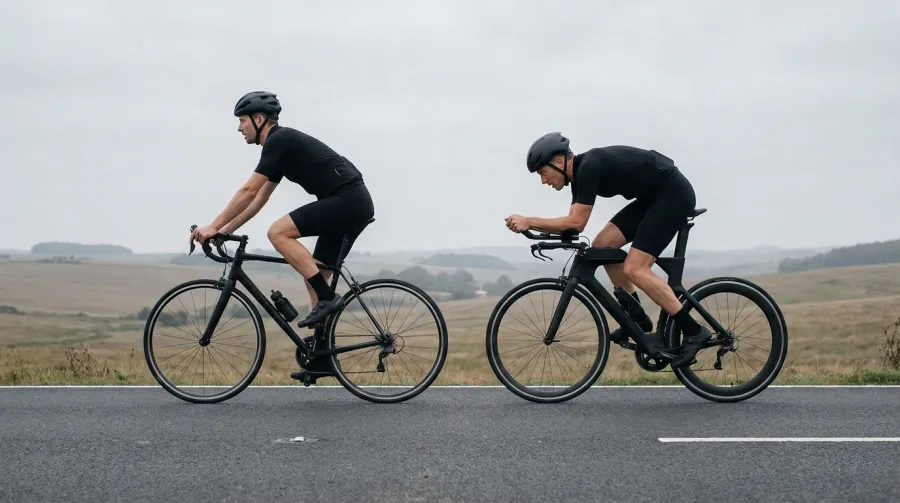
The most common error is applying a road cycling position logic to a triathlon context — specifically, prioritising aerodynamics above all else. A flat back, aggressive drop, and closed hip angle looks fast in photos. In practice, at 70.3 and full Ironman distances, it compresses the hip flexors so severely that athletes either lose power output on the back half of the ride or stumble off the bike with legs that can't run for the first kilometre. Sometimes both.
The second most common error is the opposite: sitting up too high out of fear of the aggressive position, producing a comfortable but embarrassingly slow silhouette. Neither extreme wins races. The goal is to find the specific angle that lets you generate power efficiently and preserve your running mechanics — and that angle is different for every race distance.
The Critical Numbers: What Actually Gets Measured
Hip Angle — The Number That Controls Everything
Hip angle is the angle between your torso and your femur (thigh) at the top of the pedal stroke, when your knee is at its highest point. It's the most important measurement in triathlon bike fitting and the one most often ignored in off-the-shelf fits.
The tighter (more closed) your hip angle, the more aerodynamic your position — and the more stress you place on the hip flexors over long efforts. The more open your hip angle, the more power you preserve and the better your run legs will feel — at the cost of aerodynamic drag.
Target ranges by race distance:
- Sprint: 90–100° — you can afford aggression; the race is short enough that hip flexor fatigue won't compound
- Olympic: 85–95° — slightly more open; the run matters more at this distance than most athletes realise
- 70.3: 80–90° — this is where hip angle compromise becomes critical; too closed and your run falls apart
- Full Ironman: 75–85° — a more open position that protects the run. You are not a professional. The pros can hold 65° for 180km. You cannot.
Saddle Height
Saddle height is the distance from the centre of the bottom bracket to the top of the saddle along the seat tube. Get this wrong and nothing else matters — too high, and you rock your hips with every pedal stroke, torching your IT band and lower back; too low, and you lose power and stress your knees.
The most reliable starting formula: saddle height = inseam length × 1.09. Measure your inseam barefoot (heel to floor, with a book against the wall), multiply by 1.09, and that's your starting point in millimetres from BB centre to saddle top.
The field test: clip in, put your heel on the pedal at the six o'clock position (straight down). Your leg should be fully straight with a very slight bend at the knee — not locked out, not obviously bent. This is your rough starting height. Fine-tune by watching for hip rocking when you ride — if your hips shift left and right with each stroke, drop the saddle 2mm at a time until it stops.
On a TT bike specifically, you'll often run the saddle higher than your road bike because the seat tube angle is steeper (typically 76–80° vs. 73° on a road bike), which shifts your hips forward and requires a height correction to maintain the same knee extension.
Stack and Reach
Stack is the vertical distance from the centre of the bottom bracket to the top of the head tube. Reach is the horizontal distance between the same two points. Together they define how stretched out and how low you are on the bike.
On a TT bike, you're not adjusting these directly — you're adjusting the position of your body relative to the cockpit using saddle setback, aerobar extension length, and stem spacers. But understanding stack and reach matters when you're buying a bike. A frame with very low stack will demand significant flexibility and core strength to hold the aero position for any meaningful duration. For most age-group athletes, a slightly higher stack (more stack, less drop) produces a sustainable position that can actually be held for 90 to 180 minutes rather than looking perfect for three minutes in the car park.
Aerobar Width and Drop
Aerobar width is measured between the centres of the two elbow pads. The standard starting point is shoulder-width or slightly narrower — typically 10–20cm between pad centres depending on your build. Too wide and your shoulders open up, killing aerodynamics and causing upper back fatigue. Too narrow and you restrict your breathing and create shoulder impingement over long efforts.
Drop refers to how far below your saddle height your elbows sit on the pads. More drop equals more aero and more hip flexor compression. Less drop equals less aero and more comfort. For sprint triathlons, you can handle 8–12cm of drop. For full Ironman, most age-groupers perform better with 2–6cm. The "I want to look like a pro" position you see on Instagram involves 15+ cm of drop. Unless you have the flexibility of a circus performer and the hip flexor strength of a professional cyclist, this will cost you your entire run.
The Five Mistakes That Are Wrecking Your Race
1. Too much drop, not enough miles in position. The most common and most expensive mistake. An aggressive aerobar drop looks fast, but unless you've spent months training your body to hold it, you'll lose the position by hour two and slow to a speed that would embarrass a comfort-oriented commuter. Position only works if you can maintain it. If you can't hold your aero position for 90% of your race without your back convulsing, your position is too aggressive.
2. Saddle too high. Easy to see from behind — the athlete's hips rock side to side with each pedal stroke like they're auditioning for a nautical film. Hip rocking is a red flag for IT band issues, lower back pain, and saddle sores. Drop the saddle 2mm at a time until the rocking stops. Most athletes are surprised how much lower their saddle needs to go.
3. Aerobars too wide. Riders who come from a road background often set their elbow pads at road handlebar width — which is way too wide for an aero position. Bring them in until your elbows are inside your knees on the upstroke and your shoulders feel stacked rather than shrugged.
4. Ignoring the hip angle for your race distance. Fitting for a sprint and then racing a 70.3 in the same position is a popular way to turn a promising race into a suffer-fest with a very slow run split. The hip angle that works for a 20-minute bike leg does not work for a 2.5-hour one. Know your primary race distance and fit for that.
5. Setting it and forgetting it. Your position should change as your flexibility, strength, and body change. A fit from two years ago may no longer reflect what you can actually hold or what's optimal for your current fitness level. If you've significantly increased training volume, changed race focus, or had a layoff, your position needs a reassessment.
The Hip Angle Compromise: Power vs. Run Preservation
This is the central tension in triathlon bike fitting, and it's worth understanding properly because it explains every other decision you make about your position.
Closing your hip angle (more aggressive, lower position) does two things: it improves your aerodynamics by reducing frontal area, and it places sustained mechanical stress on your hip flexors and iliopsoas — the muscles you need to lift your knees during the run. Hold a very closed hip angle for 2–3 hours, and those muscles arrive at T2 in a compromised state that takes anywhere from 500m to 5km to shake out. For many athletes, that translates directly into a slower run split than a more conservative position would have produced even if the bike split was marginally faster.
The research supports a position that's aero enough to reduce drag meaningfully but open enough to preserve run mechanics — which is generally the 80–90° range for 70.3 distances and the 75–85° range for Ironman. This is not a compromise that sacrifices performance. It's a compromise that maximises total race performance, which is the only performance that counts when you cross the finish line.
The practical test: ride your target race distance (or 75% of it) at race effort in your current position. Then get off the bike and run 3km at race pace. If your running form is significantly degraded compared to a fresh run — hunched forward, shortened stride, heavy heels — your position is too aggressive for that distance. Open the hip angle and repeat until your run off the bike looks like an actual run.
The 12-Week Position Adaptation Protocol
You cannot simply bolt on a new position and expect your body to hold it on race day. Aero positions require muscular adaptation, particularly in the hip flexors, hip extensors, and core. Here's a structured protocol:
Weeks 1–2: Baseline and Assessment. Ride in your current position with a recording device (phone propped on your trainer, or a training partner with a camera). Note where your position breaks down — how many minutes in, and which body part gives first. This baseline tells you exactly what needs to change.
Weeks 3–4: Small Adjustments Only. Make one change at a time, maximum 5mm or 2° per adjustment. Common first moves: saddle height correction, aerobar width adjustment. Ride with the new position for at least 3 sessions before assessing. Back pain that appears within the first two sessions of a new position usually means the change was too aggressive.
Weeks 5–8: Progressive Loading. Begin extending your time in the aero position. Start with 15-minute blocks of sustained aero riding within longer rides, building to 45–60 minutes of continuous aero position. Core strength work off the bike — specifically anti-rotation planks, bird-dogs, and hip flexor stretching — accelerates adaptation significantly.
Weeks 9–12: Race Simulation. Full race-distance rides in position, followed by a brick run. This is your final diagnostic. You should be able to hold your position for 90% of the ride and run off the bike without a significant mobility deficit. If you can't, open the hip angle 5° and repeat weeks 5–8.
When to Invest in a Professional Fit
The short answer: at least once, ideally before you buy your TT bike rather than after. A professional fit is not a luxury item for athletes training for full Ironman — it's a diagnostic tool that pays for itself in time savings and injury prevention over a single season.
Basic fit ($150–300): A certified fitter on a fit bike, using visual assessment and plumb-line measurements. Good for establishing rough parameters on a new bike or identifying obvious position problems. Will catch saddle height, cleat position, and gross aerobar issues. Won't catch subtle hip rotation, pelvic tilt, or leg-length discrepancies.
Full motion capture fit ($300–600): Uses reflective markers and video analysis (sometimes force pedals and pressure mapping) to measure your position dynamically while you're actually riding. Identifies asymmetries, compensations, and inefficiencies that aren't visible to the naked eye. If you're training for a 70.3 or beyond and spending serious time on the bike, this is worth every cent. A single position change identified in a motion fit can recover 3–8 watts of output and prevent injuries that would sideline you for weeks.
The most common mistake is getting a fit and then ignoring the fitter's recommendations because they feel uncomfortable. New positions always feel wrong before they feel right. Trust the numbers, log the adaptation work, and reassess in six weeks.
The Checklist to Bring to Your First Fitting Appointment
A bike fit is only as good as the information you bring to it. Show up prepared and you'll get a position that actually matches your racing life:
- Your bike, fully assembled — obvious, but bring the actual bike you race on, not the loaner your buddy said was "basically the same"
- Your race shoes and cleats — cleat position is part of the fit and gets adjusted; don't bring casual shoes
- Your race kit — your trisuit changes your body position and flexibility slightly; wear what you race in
- A list of your goal races and distances for the next 12 months — the fitter needs to know if you're racing sprint events or heading to Kona
- Any injury history — previous knee surgeries, hip issues, back pain, IT band problems — all of this affects what position is appropriate
- Your current training load — a fitter building a position for someone doing 8 hours per week vs. 20 hours per week will approach it differently
- Current saddle height and aerobar measurements — take photos of your position before you go so you have a baseline to compare against
- Nutrition for a longer session — a proper fit can run 2–3 hours; bring food and water
- A notebook — write down every measurement before and after; you'll thank yourself the first time your bike gets knocked over in transition
The Bottom Line
Your bike fit is either an asset or a liability on race day. There is no neutral position — every millimetre is either helping you go faster or costing you time and hip flexor function. The athletes who race well don't just train hard; they train smart in a position that they can actually hold, that protects their run, and that has been adapted to over weeks and months rather than bolted on the week before the race.
Take the 12-week protocol seriously. Get a professional fit at least once. Know your hip angle targets for your race distance and stop trying to look like a pro on a 90-second Instagram reel. The goal isn't a beautiful position in the car park. The goal is a fast position you can sustain for the entire bike leg, followed by a run that resembles actual running.
Your legs — and your run splits — will thank you.


