

I bolted my first set of clip-ons onto a Trek road bike I'd bought used off Craigslist, in a parking lot, using the little hex key that came in the box. I got the width right and the stack wrong, and I rode an entire Olympic-distance race with my left wrist cocked at an angle that left it numb for two days afterward. Nobody at that shop mentioned a bike fit. Nobody mentioned that the $140 bars I'd just bought were actually one of the better values in the sport. I found both of those things out the hard way, which is more or less how everyone finds out anything about aero bars.
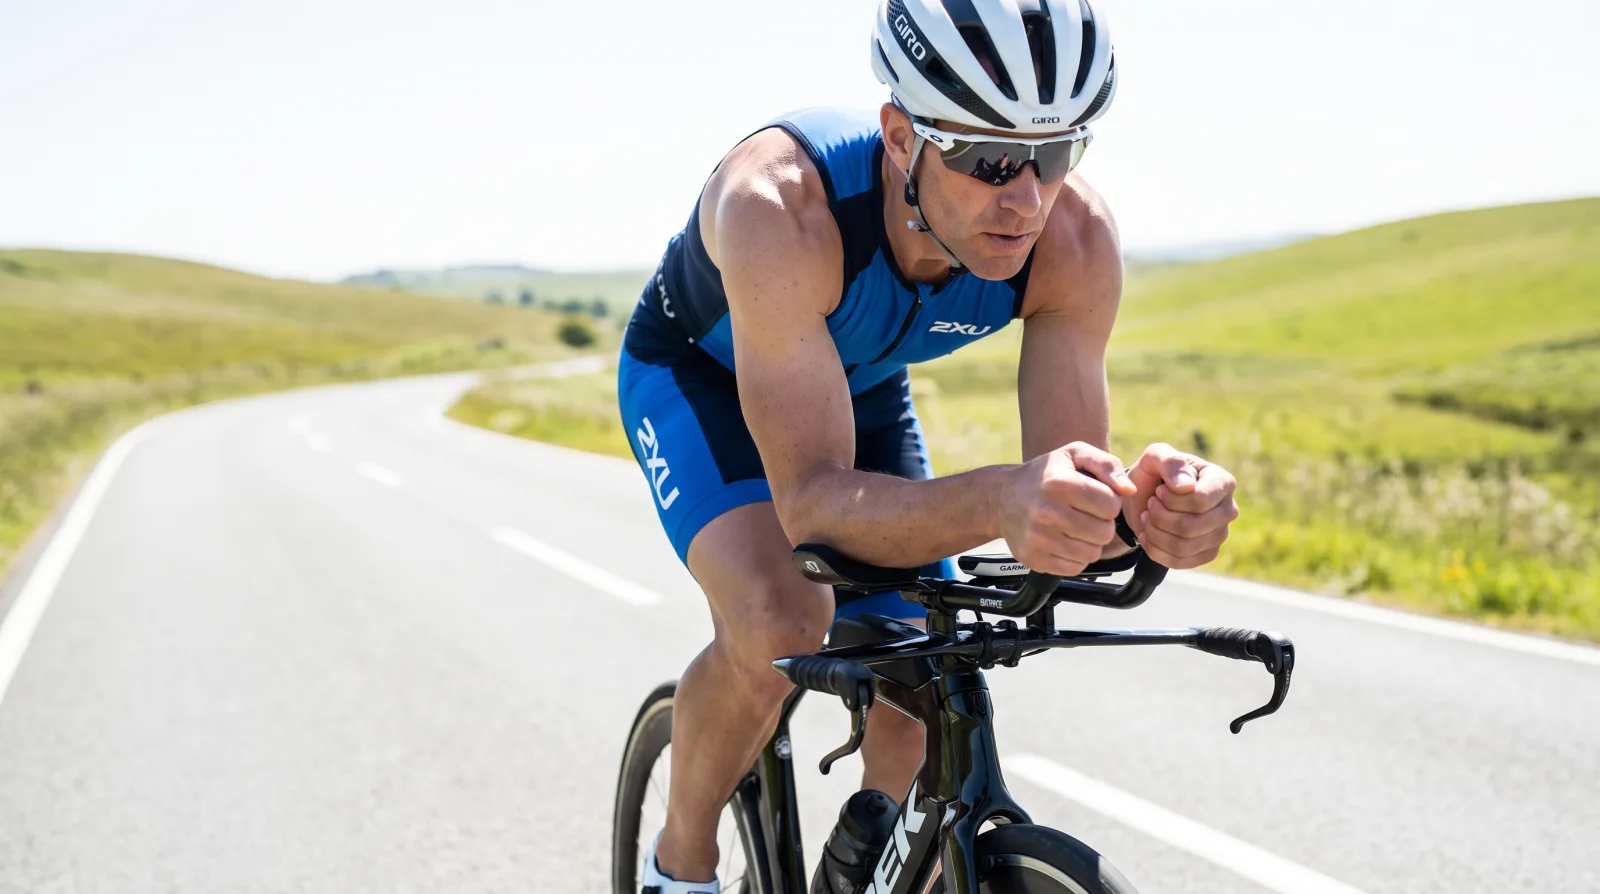
You don't need a $6,000 tri bike to go faster on the bike leg. You need a road bike you already own, a set of clip-ons, and about twenty minutes with an Allen key. That's the whole pitch of this article: seven real aero bars, all currently sold, all bolt onto a standard road handlebar, ranging from $115 to $430. I rode five of these seven myself across two seasons of racing and training partners on my local club ride own the other two, so what follows isn't a spec-sheet rewrite. It's what actually holds up over 90 minutes on the Blue Ridge Parkway in July.
Do Aero Bars Actually Make You Faster?
Yes, and by more than almost anything else you could spend money on. BikeRadar ran a full wind-tunnel test of common aero upgrades and found that a basic set of alloy clip-on bars saved their test rider 31.33 watts at 35 km/h compared to riding on the hoods, more than aero wheels, more than an aero helmet, more than a skinsuit. That's a time saving of 6 minutes 21 seconds over 60 km, for a cost of about $4.47 per watt saved. Compare that to aero wheels at roughly $118 per watt. Clip-on bars were, by a wide margin, the best value in the entire test.
Aerodynamicist Xavier Disley, who's done wind-tunnel work with pro triathletes including Katie Zaferes, puts the number at 10 to 30 watts saved moving from an aero-hoods position into a proper aerobar tuck at 45 km/h, which lines up with Specialized's own tunnel testing showing a 1-minute-40-second gain over a 40 km time trial. 220 Triathlon ran a similar test in their own tunnel and landed on 102 seconds saved over the same 40 km distance at 45 km/h, using a Profile Design Sonic Ergo 39a, one of the bars on this list. Three separate tunnels, three separate test rigs, and they all land in the same neighborhood: somewhere around a minute and a half over an Olympic-distance bike leg, for less than the cost of a decent pair of running shoes.
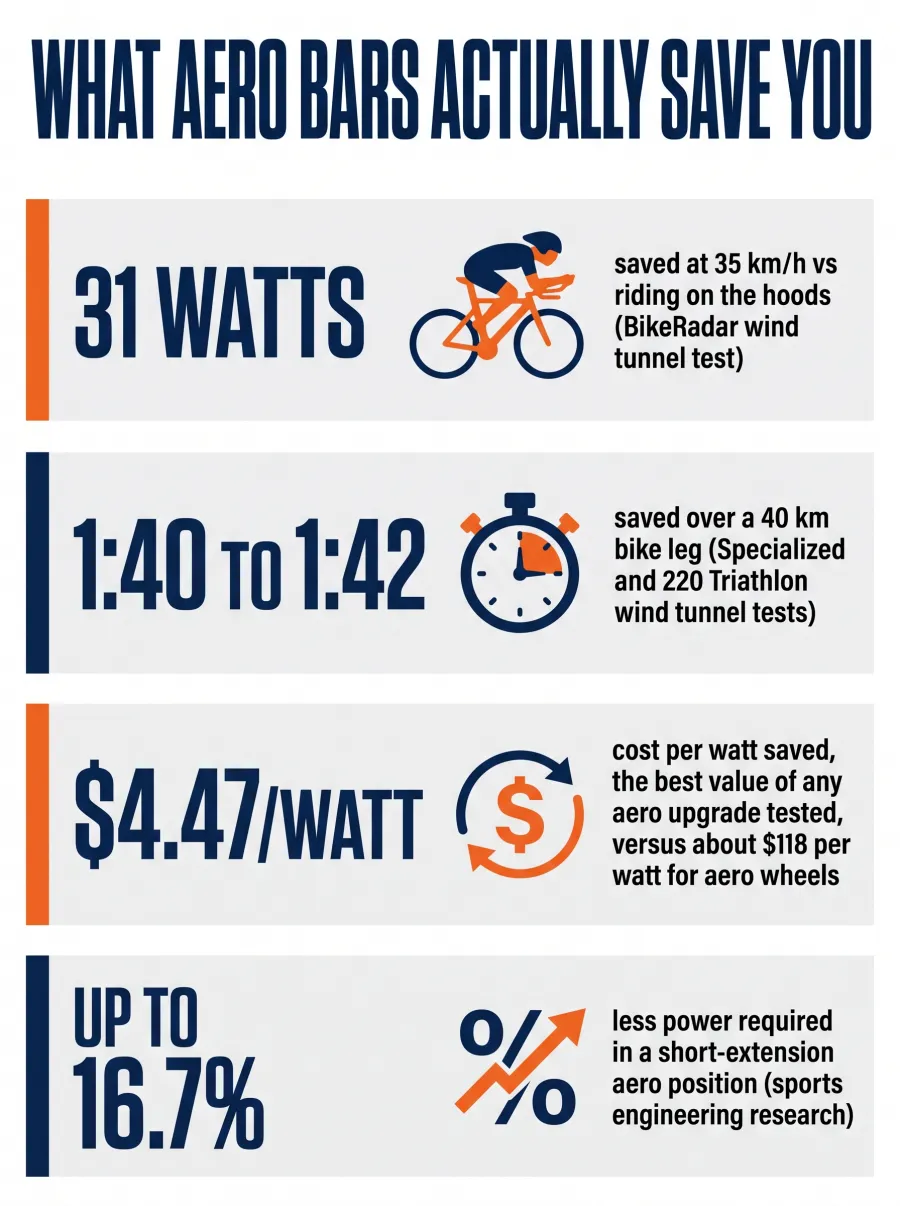
There's a catch, and it's not really about the bars. A sports-engineering study on riding posture found that short bar extensions can cut required power by up to 16.7% in a draft-legal triathlon position, but that number assumes you can actually hold the position. Disley's research with Vincent Luis found that if you're not using the clip-ons for more than half the bike leg, they stop paying for themselves, because the bars themselves add a small amount of drag when you're not tucked into them. Translation: buy bars you'll actually use, not bars that look fast in your garage.
What to Check Before You Buy
Every bar on this list clamps onto a standard round handlebar, but the details matter more than the marketing photos suggest. Here's what actually changes your experience.
Clamp diameter. Modern road bars are almost always 31.8mm at the center. Older bikes, and some entry-level ones, use 26.0mm. Most of the bars below ship for 31.8mm with a shim kit for 26.0mm, but check your own bar before you order, because a shim kit you forgot to add to the cart turns a 20-minute install into a second trip to the shop.
Extension shape. S-bend extensions drop your hands low and are the most common shape on budget bars. J-bend and ski-bend extensions curve your wrists into a more neutral, "handshake" position, which is more comfortable over long rides but usually costs more because the tooling is harder. If you've ever gotten numb hands on a long ride, this is the spec to pay attention to, not the weight.
Armrest adjustability. This is where the price gap between a $115 bar and a $300 bar actually shows up. Cheap bars give you two or three fixed arm positions. Expensive ones give you dozens, in both width and fore-aft reach, which is the difference between "close enough" and a position a bike fitter would actually sign off on.
Material. Aluminum extensions flex slightly under load and weigh more. Carbon extensions damp road vibration better and shave 100 to 150 grams, which matters for racing weight but does essentially nothing for your actual speed. Don't let a carbon weave talk you into spending double for a benefit you won't feel.
Profile Design Century Aerobar
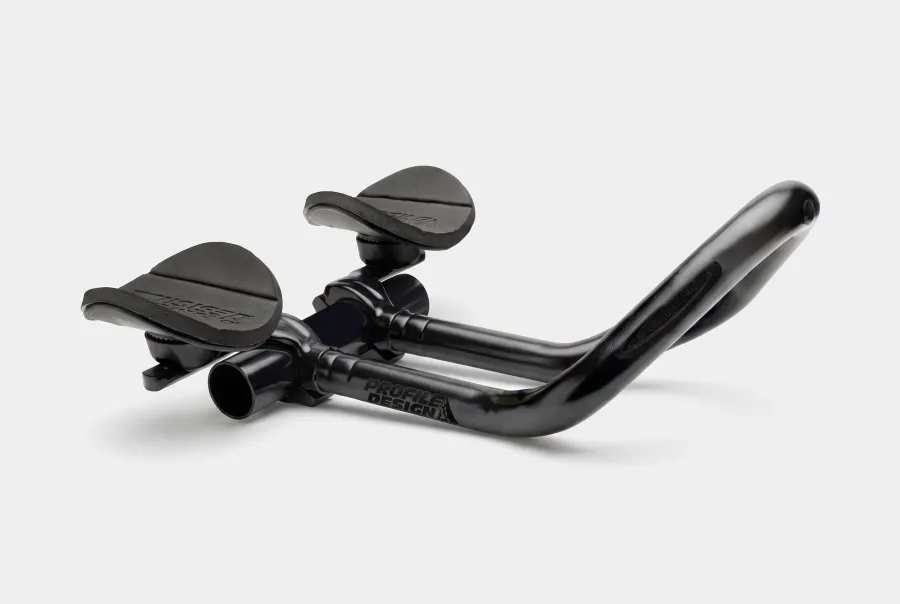
Profile Design has been making aerobars since before most of the brands on this list existed, and the Century is their answer to "I just need something that works." One-piece aluminum construction, a higher resting position than most race-oriented bars, and three fixed mounting widths instead of infinite adjustability. At $115 it's the cheapest bar here and the one I'd put on a first-time Ironman athlete's bike without a second thought. The tradeoff is real: there's no length adjustment on the extensions, and the armrests are basic foam, not the gel-infused pads you get further up this list. I rode a pair of these for an entire 70.3 build and never once wished for more adjustability, mostly because I never knew what I was missing. For a first bike or a backup bike, that's exactly the point.
- Price: $115
- Weight: 572g
- Clamp: 31.8mm (26.0mm with included shims)
- Best for: first-timers, backup bikes, anyone who wants to try aero before committing to a pricier setup
Profile Design Sonic Ergo 39a
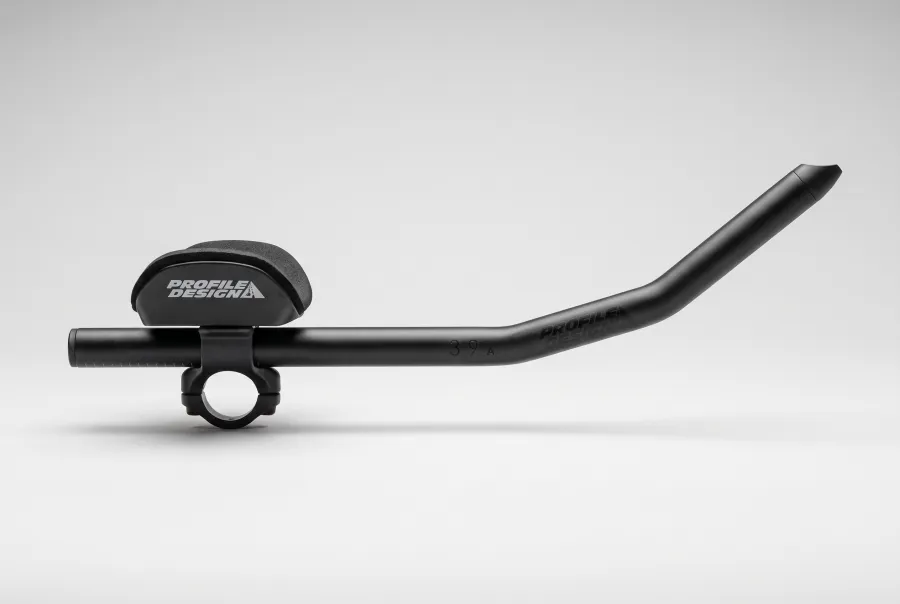
This is the bar from the 220 Triathlon tunnel test referenced above, and it earns the spot. Profile Design claims over 1,500 possible position combinations between the armrest width, offset, stack, and extension rotation, which sounds like marketing copy until you actually sit on one and realize you can dial out a sore shoulder or a tight hamstring without buying a different bar. The 39-degree extension angle keeps your grip high and your head up, which I found noticeably easier to sight buoys and traffic from than the lower S-bend bars I'd ridden before. At $209, it's not cheap for an aluminum bar, but you're paying for the adjustment range, not the material.
- Price: $209
- Weight: 564g
- Clamp: 31.8mm (26.0mm with shim kit)
- Best for: riders who want a precise, bike-fitter-approved position without paying for carbon
Redshift Sports Quick-Release Clip-On Aerobars
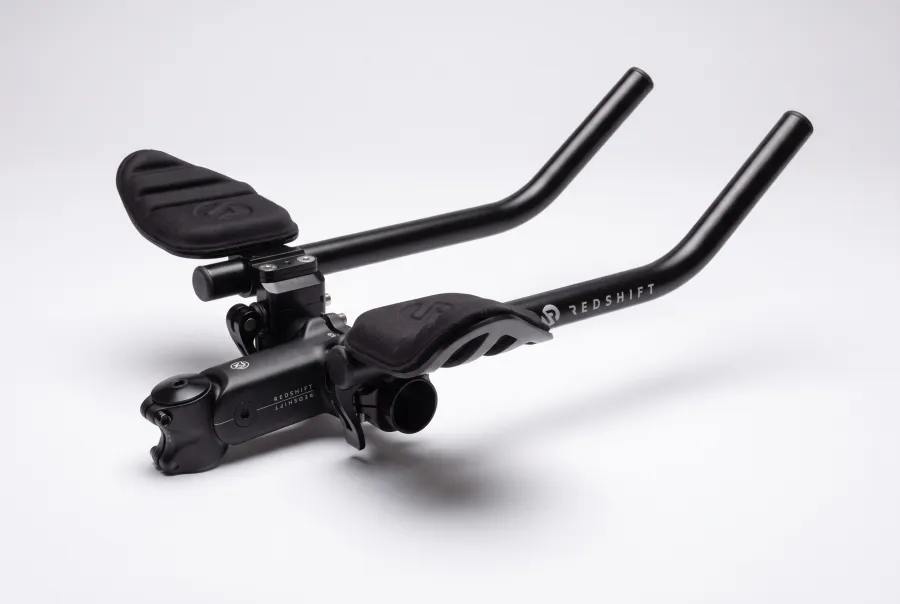
If you own exactly one road bike and it needs to be both your group-ride bike on Saturday and your tri bike on race morning, this is the product that solves that specific problem. A quick-release lever lets you pull the entire aerobar off in seconds, no Allen key, and clip it back on in the exact same position every time. Reviewers at Cyclingnews and Bikegeardatabase both landed on the same conclusion I did after a season with a borrowed set: the quick-release mechanism works exactly as advertised, but if you're the type of rider who leaves the bars on permanently, you're paying $219.99 for a feature you'll use twice. My training partner who splits her riding between a gravel group and triathlon swears by them. I don't ride enough non-aero miles to justify the premium myself.
- Price: $219.99 (full Switch Aero System with seatpost: $429.99)
- Weight: 650g
- Clamp: 31.8mm
- Best for: one-bike households that need to switch between road and aero setups fast
PRO Missile EVO Carbon Clip-On
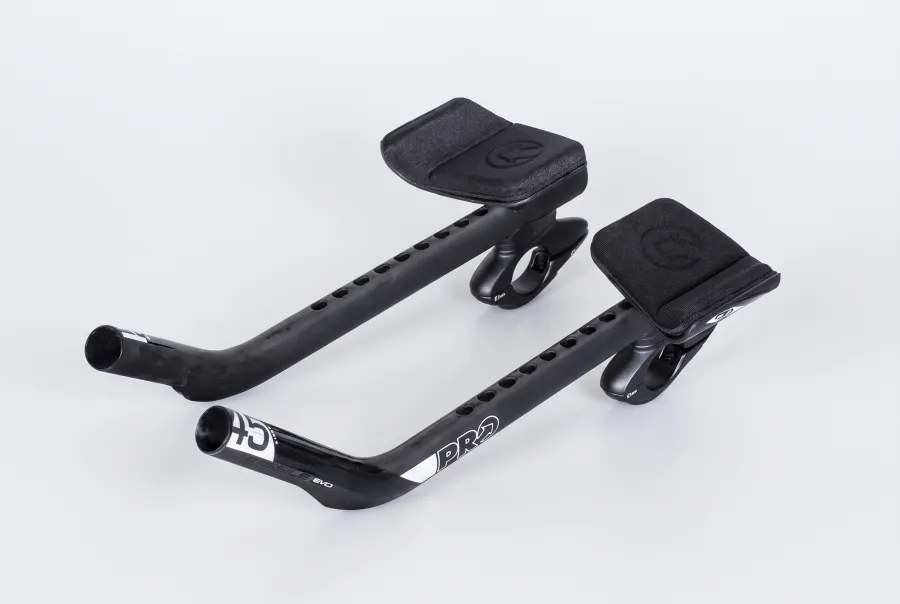
Shimano's component brand PRO has been refining this bar since the original Missile won a team time trial stage at the Giro d'Italia back in 2009, and the current EVO version still carries that pedigree. The ski-bend carbon extensions are drilled with weight-reduction holes down the length, which looks aggressive and also happens to work: full build weight lands around 400 grams with armrests, pads, and hardware included. The extensions run 370mm and can be trimmed down to 150mm in 15mm increments if you want a shorter, more compact tuck. US retail runs close to $600, which is the steepest price on this list for a clip-on-only setup, and it's a number I'd only justify if you're already racing competitively and chasing marginal gains rather than just trying to get aero for the first time.
- Price: ~$600
- Weight: 400g (full build)
- Clamp: 31.8mm
- Best for: competitive age-groupers who want a race-proven carbon bar and don't blink at the price
Zipp Vuka Clip with Carbon Evo Extensions
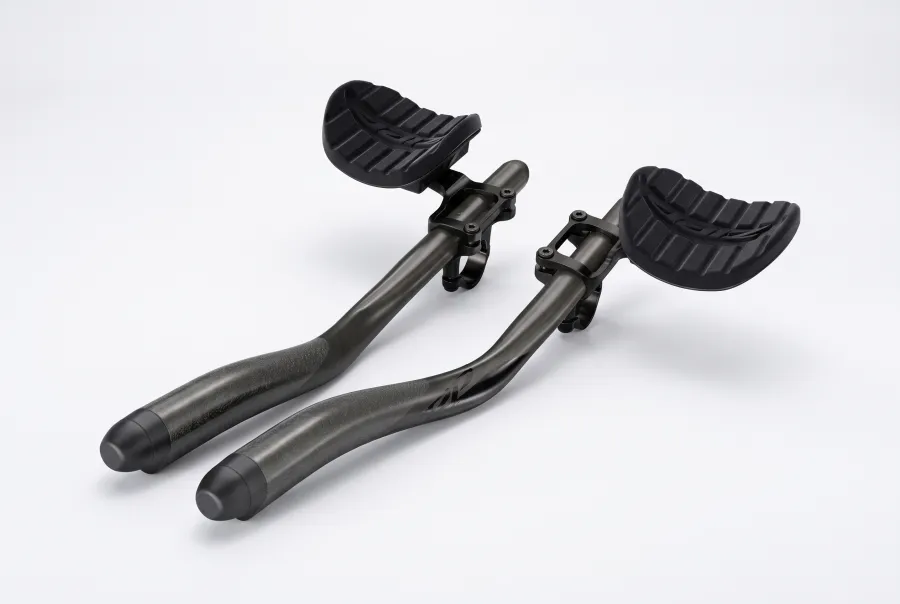
Zipp built the Vuka Clip around feedback from professional bike fitters, and it shows in the small details competitors skip: pad-angle wedge inserts that tilt your armrests upward in 5-, 10-, or 15-degree increments, and an above- or below-bar mounting choice that lets you fine-tune stack height without buying a riser kit separately. The Carbon Evo extension's 20mm inward roll and multi-radius bend is designed to feel, in Zipp's words, like shaking hands with the bar, and after a long ride I understood what they meant. My wrists stayed in a more neutral position than on any S-bend bar I've used. At $295 it sits in the middle of this list price-wise, but the adjustability punches well above that.
- Price: $295
- Weight: ~400g (clamp, extensions, armrests)
- Clamp: 31.8mm
- Best for: triathletes who want pro-level fit adjustment without jumping to the most expensive bar on the list
Vision TriMax Carbon Clip-On
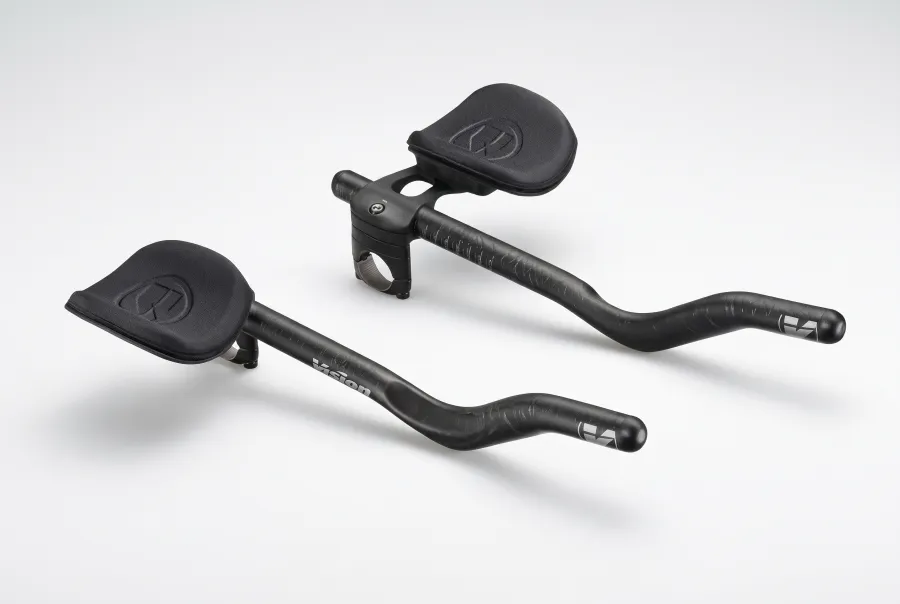
Vision sells the TriMax Carbon Clip-On in three extension shapes, S, J, and JS, which is more choice than most riders need but genuinely useful if you've already got a position dialed in on another bike and want to match it. Internal cable routing and Di2 compatibility are the standout features here, letting you keep a clean cockpit even with electronic shifting cables running through the bar. Weight lands between 496 and 505 grams depending on bend, and the armrest width adjusts from 210mm to 360mm, wide enough to fit nearly any shoulder width without a separate parts order. At $326 it's priced like the premium option it is, and it rides like one too; I'd call it the bar for someone upgrading from a cheaper clip-on who already knows exactly what they're missing.
- Price: $326
- Weight: 496-505g depending on bend
- Clamp: 31.8mm
- Best for: riders upgrading from an aluminum bar who want full carbon and Di2-ready internal routing
Redshift Sports Switch Aero System
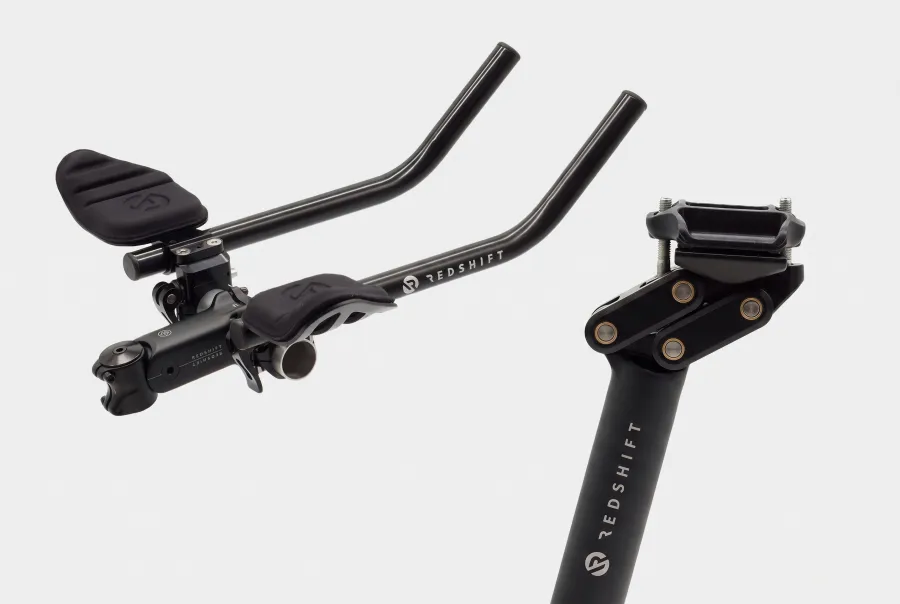
This is the Quick-Release bars from earlier in this list, bundled with Redshift's dual-position seatpost, which slides your saddle forward about 5cm when you're down in the extensions, putting you into what Redshift calls the "power position." Cyclingnews tested the full system and landed on a mixed verdict I largely agree with: the bars alone are a tough sell against cheaper fixed options, but the seatpost genuinely changes how the whole setup rides, moving your hips into a position that keeps your hip angle open even when your torso drops low. Reddit's r/triathlon consensus mirrors that split. Half the thread calls the seatpost a gimmick you'll set once and forget; the other half says it's the single piece of kit that made clip-ons comfortable for century rides. At $429.99 for the full system, this is a buy for someone converting a road bike into a genuine part-time tri bike, not someone who just wants aero bars.
- Price: $429.99 (full system)
- Weight: 650g (bars) + 400g (seatpost)
- Clamp: 31.8mm
- Best for: converting one road bike into a true dual-purpose road and triathlon machine
Getting the Position Right Once They're On
Buying the right bar solves maybe half the problem. The other half is the fit, and I learned that lesson the expensive way with the numb-wrist race I mentioned at the top of this article. Start with your armrests roughly shoulder-width apart, not narrower, no matter how aero the magazines make narrow positions look. Narrow is faster in a wind tunnel and useless if you can't hold it for three hours. Set extension length so your elbows sit just behind your shoulders, not stretched out in front of them, which keeps weight on your core instead of your hands.
Ride the position on a trainer before you ride it in traffic. A fixed trainer lets you make small adjustments, pedal for ten minutes, and reassess without worrying about braking or steering, and it's the single best twenty dollars of advice in this entire article. If something still feels wrong after two or three rides, that's not a you problem, that's a bike fit problem, and a proper fit session with a trained fitter will save you more time on race day than any bar on this list by itself.
I still have that first pair of Profile Design bars in a box in my garage. They're not on my current bike, but I keep them because they're a reminder that the gear matters less than knowing how to use it. Buy the bar that fits your budget and your bike, then spend the time getting the position right. That's the upgrade nobody sells you, and it's the one that actually works.


